Quick-start Guide
TIP
To associate a QuakeSaver sensor to your user account it will be helpful to have your QuakeSaver token already at hand.
Connecting via Ethernet
The simplest, most reliable and secure way to connect your sensor is using an Ethernet cable. Simply plug the Ethernet cable in the designated receptacle.
TIP
Static IPv4 addresses should be configured on the infrastructure/router side. This method also ensures that no bad actor can hijack the Ethernet port.
Connecting via Wi-Fi
Make sure that no Ethernet cable is connected. Power up your device. If the sensor cannot establish a connection to a known Wi-Fi or Ethernet within 30 seconds, your sensor will open a Wi-Fi access point named QS-setup [DEVICE_ID].
Take a Wi-Fi enabled computer or smartphone and connect to that Wi-Fi access point.
Your smartphone/computer disconnects automatically from the setup access point?
Note that the Wi-Fi access point does not provide an internet connection. Your end user device may complain about that. E.g. Android 10 will inform the user that no internet connection could be established. You have to explicitly confirm that you want to stay connected.
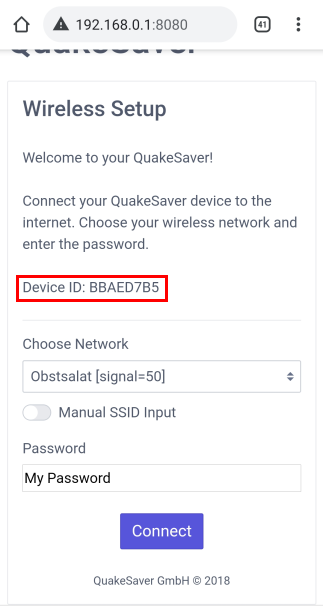
Open a browser and go to http://qssensor.local:8080 or http://192.168.0.1:8080 if you are using a smartphone or tablet to connect.
TIP
To identify your sensor later it will be useful to take note of the Device ID (red box).
Select a Wi-Fi from the drop-down menu, enter the password and click the connect button. The Wi-Fi access point will turn off, and the sensor will attempt to establish a connection to that selected access point.